Add A Firebase Backend To Your Flutter App Fast!
Benjamin Carlson / June 27, 2020
4 min read • ––– views •
Introduction
Whenever I work with Firebase, I always seem to run into small issues that can be very annoying (yet simple) to solve. When I tried to connect my Flutter application to a Firebase backend for one of my personal projects, I ran into some small issues that set me back some time. Because of this, I decided to write a simple and straightforward article showing you how to connect your Flutter application to a firebase backend for both IOS and Android. After this tutorial, you will be all set to add authentication, cloud Firestore, or any other Firebase feature you might want.
Pre Reqs
To keep this tutorial short, I expect that you have the following:
- You have Flutter installed on your machine
- You have a Flutter project started already and are ready to connect it with Firebase
If you don’t have those 2 things yet, you can read my last article where I go over how to do just that.
Creating a Firebase Project
Before we start working in Flutter, we need to create a Firebase project.
Navigate to Firebase console
Click on Add Project
Enter a project name
Choose if you want Google Analytics to be enabled (I recommend this). You can always enable this later on.
Choose what account you want this project to be associated with
Click create project
After a minute or two, your project will finish creating and you will be brought to the overview page.
Add Firebase to Android
Next, we will add Firebase to our Android version. We will need to do IOS and Android separately although the process is similar.
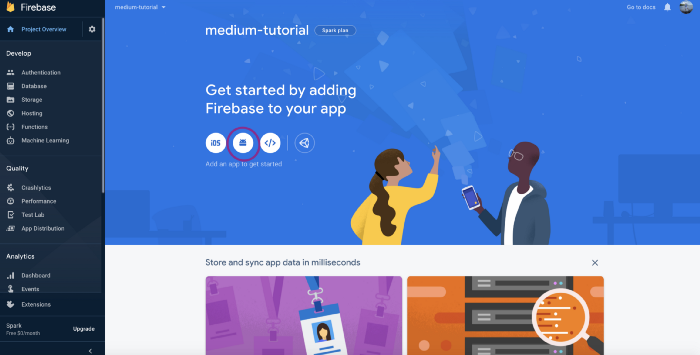
Click on the Android Icon from the overview page
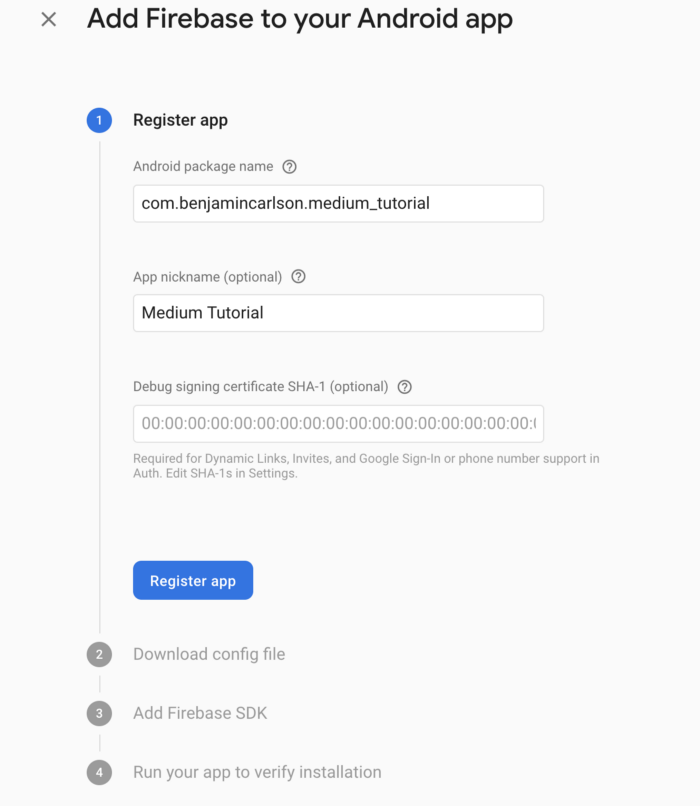
Complete the Register App step.
For Android package name use the format: com.[your name or business name].[project name]. For app nickname, use whatever name you’d like.
Step 2
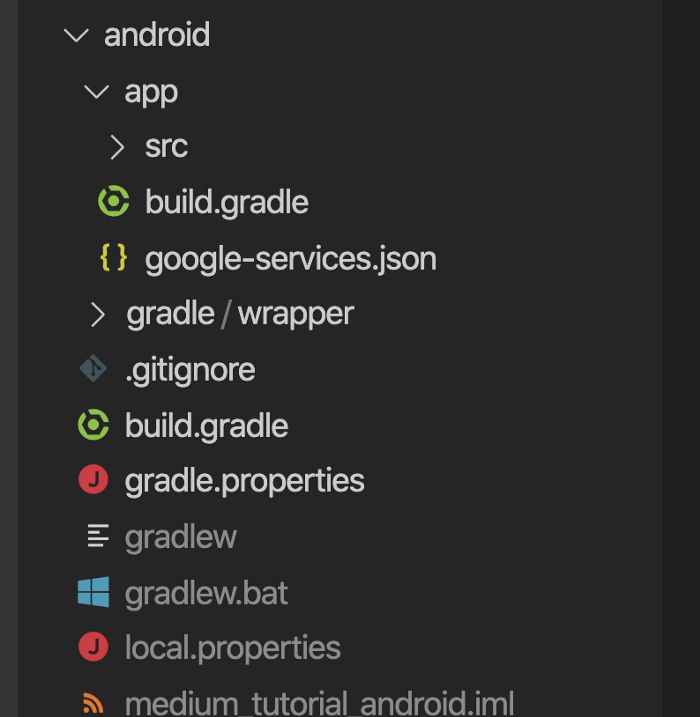
- Download the config file and place it in the app level (in the app folder).
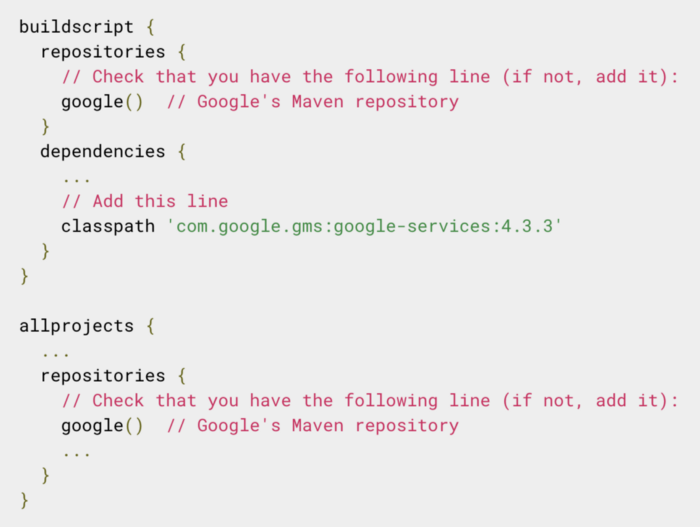
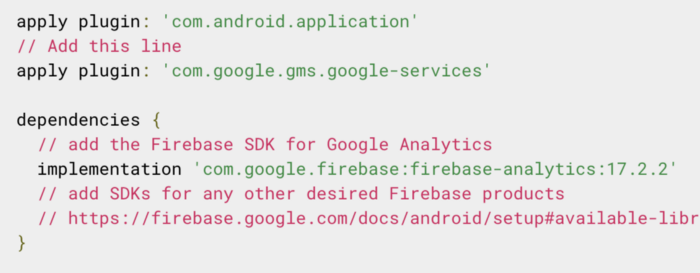
- In the project level build.gradle, add the following:
- In the app level build.gradle add the following:
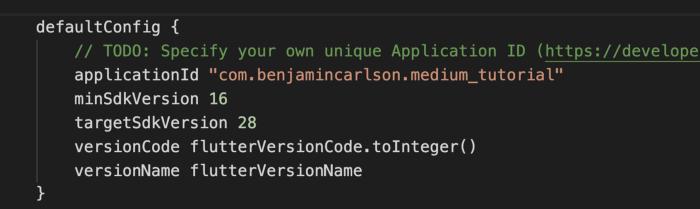
- Lastly, in the app level build.gradle file (same file as above), find the applicationId and change it to the name you chose in step 2. In my case I used com.benjamincarlson.medium_tutorial.
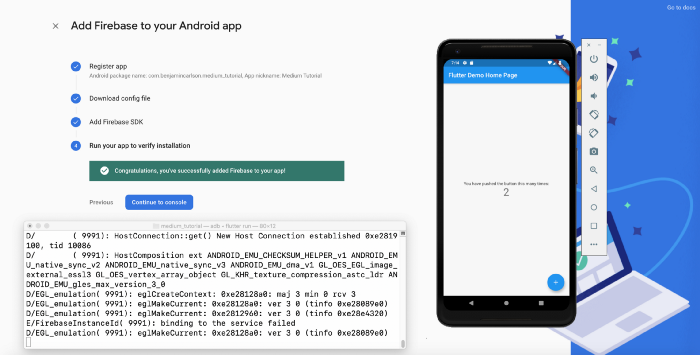
At this point we are done. Run the app with an android emulator and make sure everything works. You should see the following image below if everything works as expected.
Add Firebase to IOS
Like I said earlier, this is similar to what we did for Android.
Click on the IOS Icon from the overview page
Enter the IOS bundle ID. This can be found by opening your project in Xcode -> click on runner (top right) -> general tab -> Identity

I changed mine from com.example.mediumTutorial to com.benjamincarlson.mediumTutorial.
Enter an app nickname and app store ID (both optional)
Download the config file. Add the file in the project root by opening Xcode, right clicking on runner, and clicking “add files to runner”. You need to add the file directly through Xcode otherwise you will get an error and the app won’t run.
Skip the next 2 steps firebase tells you to do
Run the IOS app and make sure everything is working correctly
Finishing Up
The last thing you want to do is open up pubspec.yaml and add the following under dependencies:
firebase_auth: ^0.14.0+5
cloud_firestore: ^0.12.9+4
Any other firebase tools you want to use will be added here as well.
That’s it guys! I hope you found this article useful and that you are able to successfully connect your Flutter app to firebase!
Sponsor Benjamin Carlson on GitHub Sponsors
Hi 👋 I'm Benjamin Carlson, a senior college student studying computer science. I post weekly tutorial videos on my YouTube channel and build cool open source projects!